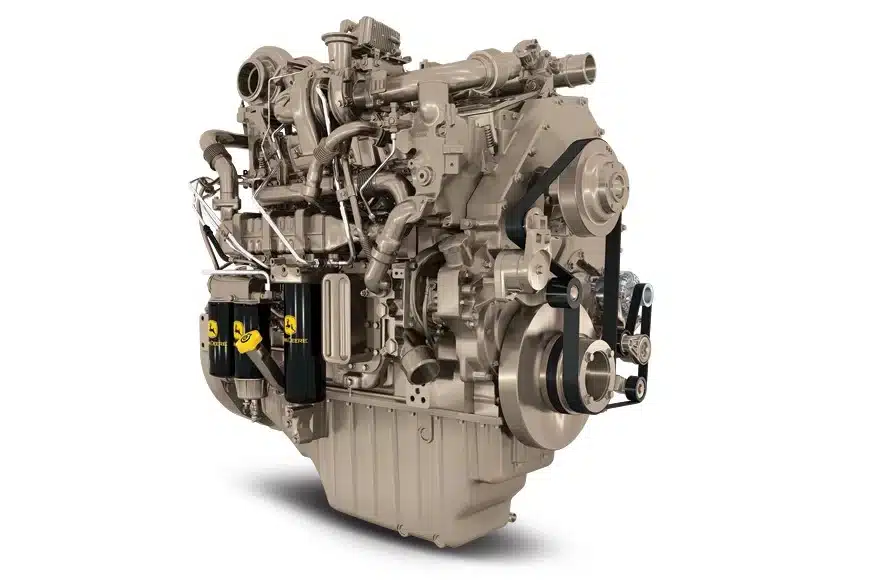
Introduced in the early 2000s as a replacement for the 12.5L (6125 Turbo), the 13.5L engine platform represents continued advancement in John Deere’s engine technology. This engine was engineered to deliver robust power for agricultural and construction machinery while meeting the ever-tightening emissions standards, evolving from Tier 2 all the way through Final Tier 4 compliance over its years of production.
Overview
John Deere’s 6135 engine incorporates advanced engine technology including:
- High-pressure common-rail fuel injection allows for more precise control of the fuel delivery, enhancing combustion efficiency and reducing emissions.
- Exhaust Gas Recirculation (EGR), Diesel Oxidation Catalyst, and Selective Catalytic Reduction (SCR) help meet stringent emissions standards, aka EPA Tier 4 Final.
- Variable Geometry Turbocharging (VGT) provides better power delivery and fuel efficiency across a wide range of engine speeds.
- Strengthened components and improved cooling for greater reliability under heavy loads.
The 13.5L engine platform has played a crucial role in John Deere’s high-performance construction and agricultural equipment over the last two decades. While there are known potential issues (see below), with preventative maintenance and timely rebuilds, this engine will continue to perform for years to come.
John Deere 13.5L Tech Specs
John Deere offers several versions of the 13.5L engine, each designed to meet specific power and performance requirements for different machines. The two main variations that meet Final Tier 4 regulations are listed below:
13.5L PowerTech™ PSS (Performance Series)
- Horsepower: 250-500 hp (varies by application)
- Torque: Up to 2,000 lb-ft
- Displacement: 13.5L
- Emissions Compliance: Tier 4 Final / Stage IV
- Technology: VGT turbocharging, common rail fuel system, EGR, and SCR
13.5L PowerTech™ Plus
- Horsepower: 250-470 hp
- Torque: Up to 1,800 lb-ft
- Displacement: 13.5L
- Emissions Compliance: Tier 4 Final / Stage IV
- Technology: VGT, EGR, SCR, and engine monitoring system for better fuel efficiency
Usage
The 13.5L engine platform is utilized across a variety of John Deere equipment, most notably in their agricultural and construction machinery lines. Some of the key applications include:
Agriculture
- 9R, 9RT, and 9RX Series Tractors: 9460R, 9510R, 9560R, 9470R, 9520R, 9570R, 9470RX, 9520RX, 9570RX (some of the RX models transitioned to Cummins X15 after 2021)
- Self-Propelled Forage Harvesters: 9700 SPFH, 9800 SPFH
Construction
- 950K Crawler Dozer
- 944K Hybrid Wheel Loader
- 848L and 948L Skidders
- 2412D and 1812D Scrapers
Forestry and Heavy Equipment
- Various forestry and heavy equipment like John Deere 748L Skidder also use the 13.5L engine platform.
Other Applications
- Industrial generators
- Stationary power applications such as powering irrigation pumps
- Specialized marine version
The engine’s flexible power characteristics and integration with John Deere’s PowerTech Plus engine technology have made it versatile for multiple machine types.
Potential Issues
While the 13.5L is generally reliable, heavy use and high hours may lead to wear or even failure. Here are some issues that have been identified, with the biggest complaint listed first:
Water Pump and Front Crank Seal Leaks
Similar but not identical to a Detroit 60, the water pump is driven off the front gear train, so pump seal failure will allow coolant to leak into the oil pan. This will create many issues such as a blown head gasket, cracked cylinder head, or worse – bearing shrapnel going through the accessory drive gears. Water pump drive failure is prevalent enough that many owners (and dealerships) replace the water pump every 2,000 hours as part of their preventative maintenance.
Camshaft
Issues resulting from excessive wear on the camshaft lobes.
Crankshaft and Rod Bearing Wear
Potential causes include high operating hours with poor oil maintenance, running under extreme load for extended periods, and coolant leaks contaminating the oil.
Cylinder Block Issues
- Cylinder Liner Cavitation – The wet cylinder lines are susceptible to cavitation erosion which can lead to liner pitting and pinholes, allowing coolant leakage into the oil. This can be mitigated through proper coolant maintenance and additive usage to replenish SCA/DCA levels.
- Rear Main Seal Leaks – High hour engines can develop oil leaks at the rear main seal. While this can be normal wear over time, it can also be a result of excessive crankcase pressure causing stress on both the rear main and front crank seals.
Cylinder Head Issues
- Head Gasket failure
- Cracks – It is not uncommon for these cylinder heads to show signs of cracking in the bridge area between the intake valve seat and/or exhaust valve seat due to thermal-mechanical stress. According to John Deere’s guidelines, if the crack is visible but does not go beyond the valve seat, the cylinder head can be rebuilt. If the crack continues beyond the valve seat insert, the cylinder head will need to be replaced.
- Head Bolts – The oil galley uses four of the head bolt holes to get oil up to the camshaft. John Deere issued a PIP to replace the standard bolts with special, rubber ribbed bolts to block oil from going down to the head gasket where it can syphon into the coolant passage.
- Valve Guides – The valve guides are sintered metal with lubricating oils that leech out during operation to protect against premature valve guide wear. If the guides are not removed before cleaning the cylinder head in a hot tank, the guide pores will not trap and release engine oil properly under thermal load. For this reason, valve guides must be removed prior to hot tanking.
- Valve Bridge – Operators have reported the valve bridge came undone and jammed the valves closed.
External Components
- Fan Pulley – The first version of the variable speed pulley was unreliable, so John Deere quickly recommended an upgrade option to avoid future issues. Fan drive bearing failure can severely damage or ruin the radiator, leading to engine overheating and more significant damage if you try to finish the field before assessing.
- High-Pressure Fuel Pump and Injectors – Pump and injector damage from water or debris in the fuel. Fuel pressure control valve failures. Poor fuel quality leading to premature wear.
- Note: Any time the EUI (electronic unit injector) is replaced, the injector sleeve must also be replaced at that time. Ensure a proper seal by replacing the injector cups at the same time as any failed injectors.
- Oil Cooler – premature failure
- Turbo – Excessive wear on the turbocharger leading to actuator failures, sticking vanes, or oil leaks.
Preventative maintenance will help most owners avoid these problems. Regular coolant testing, oil analysis, fuel quality checks, and turbo maintenance will significantly extend your engine’s lifespan. Is your engine ready for a refresh or an overhaul? Continue reading to learn how we can help you!
Baril Engine’s Complete Engine Packages
Significant differences exist in what one engine rebuilder includes in a “Short Block” or “Long Block” from another engine builder. If you’re comparing quotes for your 13.5L John Deere, please look at the details, as Baril Engine includes more in our packages than many other engine builders.
Baril Engine offers three levels of engine rebuild packages:
- Short Block (SB): Includes rebuilding the engine’s rotating assembly (block, crankshaft, connecting rods) and installing liners with O-rings, pistons, piston ring sets, piston pins & retainers, rod pin bushings, cam bushings, lower gasket set, main bearing set, rod bearing set, and thrust washer set.
- Long Block (LB): Includes all the work in the SB level and adds a complete rebuild of the cylinder head, installation of the cylinder head, camshaft, lifters, rocker arms, upper gasket set, oil cooler, oil pump, water pump, and thermostat, and adjusting of the valves.
- Ready-to-Run (RTR): Includes all work at the SB and LB levels and adds many or all of the components and parts required for the engine to be ready to run, including fuel injectors, fuel pump, and turbo(s).
Baril Engine is a custom engine builder, so our engine packages are customized to reflect each engine’s application and specific needs. Therefore, there can be considerable variation in the processes performed, the parts included, and the total cost from one engine project to the next. It is essential that we discuss and document within your estimate your engine’s history, any known issues, previous repairs, and your specific needs and goals. The more information you provide, the better positioned we are to meet your needs and exceed your goals. Please always refer to your written estimate to know what is and is not included in your engine package.
Baril Engine’s Machining, Rebuilding, and Assembly Services
Disassembly and Cleaning
A thorough and quality cleaning of the engine components is a time-consuming and labor-intensive job. However, we firmly believe it is our entire process’s foundation.
Disassembly and Cleaning details
- Disassembly of the engine and all its components.
- Initial cleaning of the components with a high temp spray wash process.
- Remove any remaining carbon or material from the parts using a variety of hand and pneumatic cleaning tools and processes.
Return to top of Machining, Rebuilding, and Assembly Services Section
Cylinder Head
[Available individually or as part of the LB & RTR packages.]
Cylinder Head Inspection details
- Magnaflux the cylinder head to identify any previously undetected cracks. Magnaflux Testing, also known as magnetic particle inspection, uses a magnetic field and an iron oxide powder or solution to identify surface cracks in metals. It is a time-proven and reliable method of identifying external cracks.
- Pressure testing the cylinder head, as the name suggests, uses air or hot water pressure to test the integrity of the internal coolant passages. With this test, we can find cracks in the head’s coolant passages, leaking frost plugs, and other defects that need to be addressed as a part of our rebuild process.
- Inspect the valves for stem wear, straightness, and if they have sufficient margin to allow grinding.
- Inspect the valve guides for wear and proper clearance.
- Inspect valve seats for wear and defects.
- Remove cam bearings from the head.
Cylinder Head Rebuilding Process details
- Resurface (mill) the cylinder head’s deck to ensure it is straight, flat, and has the proper finish.
- Grind the valves or replace them as needed.
- Install new valve seats as needed and cut them to produce three-angle valve seats.
- Remove & replace valve guides as needed.
- Replace valve springs and seals.
- Assemble the cylinder head and complete the final inspection of the finished head to verify it meets all specifications.
- Replace injector tubes.
- Install new cam bearings in the head.
Return to top of Machining, Rebuilding, and Assembly Services Section
Engine Block
[Available individually or as part of a complete engine rebuild package.]
Engine Block Inspection details
- Magnaflux the block to identify any previously undetected cracks.
- Inspect and measure each main journal bore with a dial bore gauge after torquing the main caps on to specification. This inspection allows us to see if any of the main journal bores need to be resized.
- The JD 13.5L has a wet-sleeve cylinder liner sealed with an upper deck counterbore. We inspect the block’s counterbore to determine if it needs to be reconditioned.
- Inspect the main housing bores to ensure they are round and true and determine the main bearing grade required.
Engine Block Reconditioning Process details
- Resurface (mill) the block’s top deck to ensure it is straight, flat, and has the proper finish.
- If the main housing bores are out of spec, align bore the block to correct.
- If our inspection revealed that the deck counterbore area needs work, we machine the counterbores and clean up the sealing surface. Generally, the liner protrusion is on the low end of specifications from the factory, so we cut the counterbores and, if necessary, install liner shims to achieve the correct liner protrusion.
Return to top of Machining, Rebuilding, and Assembly Services Section
Connecting Rods
[Available individually or as part of a complete engine rebuild package.]
Connecting Rod Inspection details
- Liquid Magnaflux each of the connecting rods to identify any previously undetected cracks. Any rod found to have a crack or defect is replaced.
Connecting Rod Reconditioning Process details
- Connecting rod piston pin housing bore (small end): The piston pin bushing on the small end of the connecting rod is subject to wear over time. We recondition the piston pin end on each connecting rod by removing and replacing the pin bushing and honing it to fit the new piston pin to achieve the specified clearance.
- Connecting rod crankpin housing bore (big end): If during our inspection a rod’s crankpin housing bore is found to be deformed or worn, we resize the bore by cutting the cap, torquing the cap on to specification, and bore and hone the crankpin bore to specified size and finish.
Return to top of Machining, Rebuilding, and Assembly Services Section
Crankshaft and Camshaft
[Available individually or as part of a complete engine rebuild package.]
Crankshaft and Camshaft Inspection details
- Liquid Magnaflux the crankshaft to identify any previously undetected cracks. Any crankshaft found to have a crack or defect is replaced.
- Inspect and test the journals to verify they meet or exceed the required hardness specification.
- Inspect the crankshaft for straightness and measure the size and profile of each journal to verify they are as specified.
- Inspect the camshaft and determine if it can be reused or needs to be replaced.
Crankshaft Reconditioning Process details
- If required, we grind the crankshaft after we have verified that oversized bearings are available.
- Polish all the crankshaft’s rod and main journals to their required finish.
Return to top of Machining, Rebuilding, and Assembly Services Section
Engine Assembly
[Available as part of a complete engine rebuild package.]
Pre-Assembly Engine Inspection details
- It is the assembling technician’s responsibility to inspect all parts and verify that each meets specification. We trust but verify!
Engine Assembly details
- Our highly experienced engine builders assemble all our engines in our assembly department, which is sealed off from the remainder of our shop.
- Our engine assembly is a process that involves many detailed procedures that are executed in a specific order by our engine builders so that the completed engine meets our performance and reliability standards.
Return to top of Machining, Rebuilding, and Assembly Services Section