Ford’s first entirely in-house diesel is packed with unique features, but how have their innovations held up through the last decade of heavy-duty use?
History
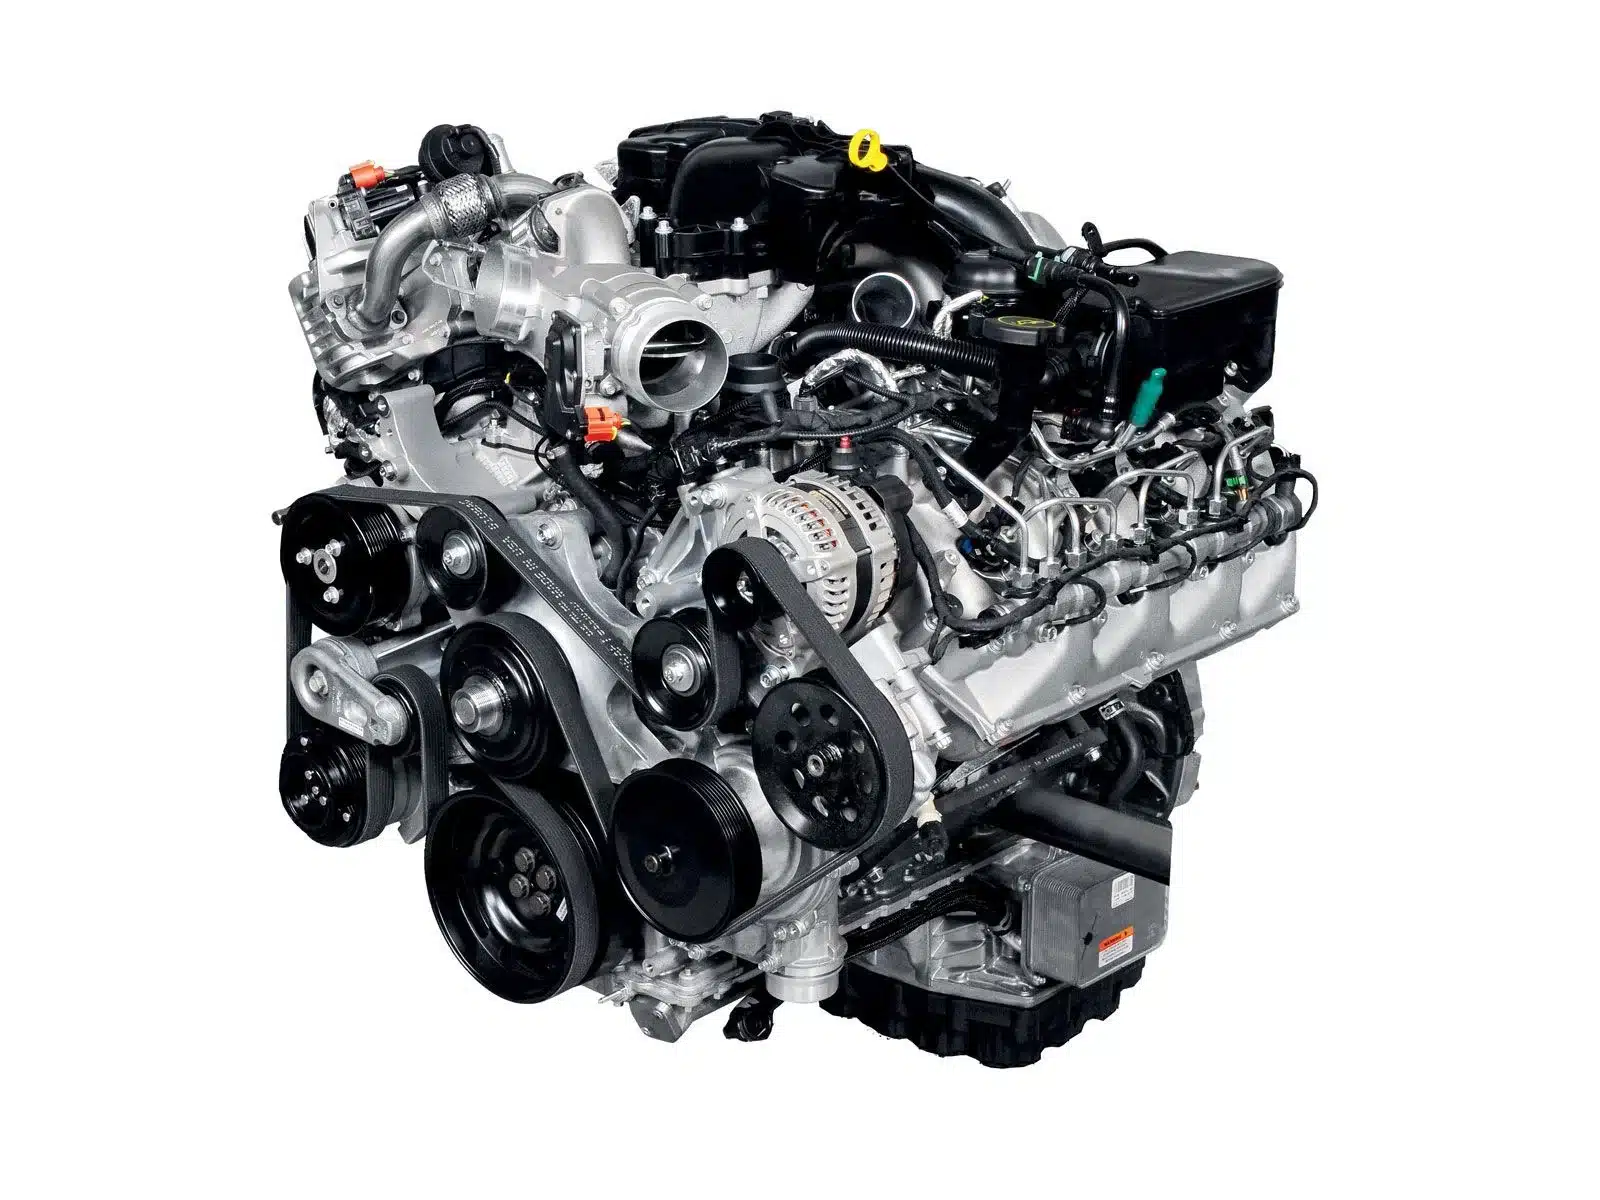
Launched in 2011, the 6.7L Power Stroke® was Ford’s first diesel designed and produced in-house for ¾ ton and larger trucks. Earlier Power Strokes were a rebadged collaboration between Ford and Navistar, but a series of warranty issues with the 6.0L and 6.4L led to project Scorpion. This endeavor was codenamed Scorpion due to the valley-mounted turbo and exhaust manifold.
The engineering team’s focus on performance, efficiency, and longevity, combined with their desire to innovate, is apparent when looking at the features included:
- Deep skirted, compacted graphite iron block
- Aluminum cylinder heads with inward-facing exhaust ports
- Four valves, four rockers, and four pushrods per cylinder
- Air-to-water intercooler
- Selective catalytic reduction
- Bosch’s high-pressure common rail system with piezoelectric injectors
- Single sequential variable geometry turbocharger
Ford has continued to build on its initial success with the 6.7L, updating components to improve horsepower & torque as well as resolving issues with the early editions. Not familiar with the problems? Please keep reading to learn what they are and the services we regularly perform on 6.7 Power Strokes.
Ford’s Power Stroke Family
- 3.0 Power Stroke: 183 cu in / 3.0L 24-valve V6 (2018-present)
- 3.2 Power Stroke (Ford Duratorq): 195 cu in / 3.2L 20-valve I5 (2015-present)
- 6.0 Power Stroke (Navistar VT): 365 cu in / 6.0L 32-valve V8 (2003-2007 Super Duty; 2003-2010 E-Series)
- 6.4 Power Stroke (Navistar MaxxForce 7): 389 cu in / 6.4L 32-valve V8 (2008-2010)
- 6.7 Power Stroke (development codename Scorpion): 406 cu in / 6.7L 32-valve V8 (2011-present)
- 7.3 Power Stroke (Navistar T444E): 444 cu in / 7.3L 16-valve V8 (1994-2003)
Known Issues
Turbocharger Issues
Turbocharger issues in the 2011-2014 models led many owners to upgrade their 1st generation 6.7L with a post-2015 turbo.
2011-2012 Honeywell DualBoost Turbo
2011-2012 models used ceramic ball bearings in the Honeywell DualBoost Turbo. Later years switched to steel ball bearings.
2011-2014 Garrett GT32 SST VGT Turbo
2011-2014 models with the dual compressor wheel Garrett GT32 SST VGT were prone to overspeeding due to the undersized 64mm turbine wheel. Under heavy load, this turbo can reach shaft speeds of 150,000-160,000 rpm.
2011-2014 Soot Buildup
2011-2014 models experienced excessive soot buildup, leading to premature VGT failure.
Fuel Pump Failures
Bosch CP4.2 high-pressure fuel pump failure in the 1st and 2nd generation 6.7 Powerstroke. A typical failure scenario begins when a lifter bucket rotates in its bore due to air bubbles within the housing, causing the pressed-in roller at the bottom to ride perpendicular to the cam lobe rather than parallel, resulting in metal-on-metal contact and the creation of metal shavings. These metal fragments contaminate the high-pressure and return circuits, damaging fuel lines, rails, injectors, and the lift pump. Ford switched to a new injection pump in 2020 with their third-generation 6.7 Power Stroke.
EGT Sensor Failure
EGT Sensor failure, primarily in 2011-2012 Chassis Cab (F-350 through F-550) “Ambulance Package” trucks.
NOx Sensor Problems
2011 models had frequent NOx sensor problems, causing the engine to go into limp mode. Ford addressed this by replacing faulty sensors and upgrading the emission control strategy.
EGR Cooler Clogging
EGR coolers can experience clogging issues with soot (carbon) buildup on the cooler core.
Broken Glow Plugs
Broken glow plugs: some early Chassis Cab models experienced glow plug tip breakage, leading to catastrophic engine failure.
Radiator Flaws
Flaws in the primary stock radiator & at the coolant inlet on the turbo, primarily in early 2011 models.
Valve Train Issues
Valve train issues, including rocker arm assembly breakage.
Baril Engine’s Complete Engine Packages
Significant differences exist in what one engine rebuilder includes in a “Short Block” or “Long Block” from another engine builder. If you’re comparing quotes for your 6.7L Power Stroke, please look at the details, as Baril Engine includes more in our packages than many other engine builders.
Baril Engine offers three levels of engine rebuild packages:
- Short Block (SB): Includes rebuilding the engine’s rotating assembly (block, crankshaft, connecting rods) and installing liners with O-rings, pistons, piston ring sets, piston pins & retainers, rod pin bushings, cam bushings, lower gasket set, main bearing set, rod bearing set, and thrust washer set.
- Long Block (LB): This includes all the work in the SB level and adds a complete rebuild of the cylinder head, installation of the cylinder head, camshaft, lifters, rocker arms, upper gasket set, oil cooler, oil pump, water pump, thermostat, and valve adjustment.
- Ready-to-Run (RTR): Includes all the work in the SB and LB levels and adds many or all the components and parts required for the engine to be ready to run, including the fuel injectors, fuel pump, and turbo(s).
Baril Engine is a custom engine builder, so our engine packages are customized to reflect each engine’s application and specific needs. Therefore, there can be considerable variation in the processes performed, the parts included, and the total cost from one engine project to the next. It is essential that we discuss and document your engine’s history, any known issues, previous repairs, and your specific needs and goals within your estimate. The more information you provide, the better positioned we are to meet your needs and exceed your goals. Please always refer to your written estimate to know what is and is not included in your engine package.
Baril Engine’s Machining, Rebuilding, and Assembly Services
Disassembly and Cleaning
A thorough and quality cleaning the engine components is a time-consuming and labor-intensive job. However, we firmly believe that it is the foundation of our entire process.
Disassembly and Cleaning details
- Disassembling the engine and all its components.
- Initial cleaning of the components with a high-temperature spray wash process.
- Remove any remaining carbon or material from the parts using a variety of hand and pneumatic cleaning tools and processes.
Return to top of Machining, Rebuilding, and Assembly Services Section
Cylinder Head
[Available individually or as part of the LB & RTR packages.]
Cylinder Head Inspection details
- Use a visible dye penetrant to test the cylinder head to identify any previously undetected issues. The dye penetrant inspection method is a nondestructive test for defects such as a crack, lap, forging burst, cold shut, shrinkage, porosity, or lack of bond.
- Pressure testing the cylinder head, as the name suggests, uses air or hot water pressure to test the integrity of the internal coolant passages. With this test, we can find cracks in the head’s coolant passages, leaking frost plugs, and other defects that need to be addressed as a part of our rebuild process.
- Inspect the valves for stem wear, straightness, and if they have sufficient margin to allow grinding.
- Inspect valve seats for wear and defects.
- Inspect the valve guides for wear and proper clearance.
Cylinder Head Rebuilding Process details
- Resurface (mill) the cylinder head’s deck to ensure it is straight, flat, and has the proper finish.
- Grind the valves or replace them as needed.
- Install new valve seats as needed and cut them to produce three-angle valve seats.
- Remove & replace valve guides as needed.
- Replace valve springs and seals.
- Assemble the cylinder head and complete the final inspection of the finished head to verify it meets all specifications.
- Replace injector tubes.
Return to top of Machining, Rebuilding, and Assembly Services Section
Engine Block
[Available individually or as part of a complete engine rebuild package.]
Engine Block Inspection details
- Magnaflux the block to identify any previously undetected cracks.
- Inspect and measure each main journal bore with a dial bore gauge after torquing the main caps on to specification. This inspection allows us to see if any of the main journal bores need to be resized.
- Inspect the main housing bores to ensure they are round and true.
- Inspect cam bearings.
Engine Block Reconditioning Process details
- Resurface (mill) the block’s top deck to ensure it is straight, flat, and has the proper finish.
- If the main housing bores are out of spec, align bore the block to correct.
- If our inspection reveals that the deck counterbore area needs work, we machine the counterbores and clean up the sealing surface.
- If cam bearings need to be replaced, we must align bore to achieve proper oil clearance, as the original camshaft bearings are a semi-finish design that requires machining after installation.
Return to top of Machining, Rebuilding, and Assembly Services Section
Connecting Rods
[Available individually or as part of a complete engine rebuild package.]
Connecting Rod Inspection details
- Liquid Magnaflux each of the connecting rods to identify any previously undetected cracks. Any rod found to have a crack or defect is replaced.
Connecting Rod Reconditioning Process details
- Connecting rod piston pin housing bore (small end): The piston pin bushing on the small end of the connecting rod is subject to wear over time. We recondition the piston pin end on each connecting rod by removing and replacing the pin bushing and honing it to fit the new piston pin to achieve the specified clearance.
- Connecting rod crankpin housing bore (big end): If during our inspection a rod’s crankpin housing bore is found to be deformed or worn, we resize the bore by cutting the cap, torquing the cap on to specification, and bore and hone the crankpin bore to specified size and finish.
Return to top of Machining, Rebuilding, and Assembly Services Section
Crankshaft and Camshaft
[Available individually or as part of a complete engine rebuild package.]
Crankshaft and Camshaft Inspection details
- Liquid Magnaflux the crankshaft to identify any previously undetected cracks. Any crankshaft found to have a crack or defect is replaced.
- Inspect and test the journals to verify they meet or exceed the required hardness specification.
- Inspect the crankshaft for straightness and measure the size and profile of each journal to verify they are as specified.
- Inspect the camshaft and determine if it can be reused or needs to be replaced.
Crankshaft Reconditioning Process details
- If required, we grind the crankshaft after we have verified that oversized bearings are available.
- Polish all the crankshaft’s rod and main journals to their required finish.
Return to top of Machining, Rebuilding, and Assembly Services Section
Engine Assembly
[Available as part of a complete engine rebuild package.]
Pre-Assembly Engine Inspection details
- It is the assembling technician’s responsibility to inspect all parts and verify that each meets specification. We trust but verify!
Engine Assembly details
- Our highly experienced engine builders assemble all our engines in our assembly department, which is sealed off from the remainder of our shop.
- Our engine assembly is a process that involves many detailed procedures that are executed in a specific order by our engine builders so that the completed engine meets our performance and reliability standards.
Return to top of Machining, Rebuilding, and Assembly Services Section